Difference between revisions of "Example atod"
| (63 intermediate revisions by 4 users not shown) | |||
| Line 1: | Line 1: | ||
| − | {{todo| | + | {{todo|SEOKWREV (12.11.13-15:24->JG+);(01.03.14-16:00->MD+);(01.03.14-18:50->KY+);(03.27.14-16:30->BS+);(04.10.14-12:05->BS+)|Jgreene|project=oe 4,oe 5,jg,md,SEOKWREV,mw,bs}} |
| − | |||
| − | + | {{#seo: | |
| − | + | |title=Example atod | |
| − | + | |titlemode=append | |
| + | |keywords=AtoD,mcp3208,Device Channels | ||
| + | |description=This is a guide to the atod_test C example project included in the EMAC OE SDK. | ||
| + | }} | ||
| − | + | This is a guide to the <code>atod_test</code> C example project included in the EMAC OE SDK. | |
| + | This application reads all channels of an ''indexed atod device'' and reports the values read from those channels to the console. Examples of this type of device are the processor AtoDs on the SoM-9260/9G20 and the IPAC-9302; and the mcp3208 external AtoD devices on the SoM-150ES carrier (see [[#Hardware Requirements|hardware requirements]], below). | ||
| − | + | The <code>atod_test</code> project builds one executable: <code>indexed_atod_test</code>. | |
| − | + | == Opening, Building and Uploading the Project Files == | |
| − | |||
| + | For information on opening the project from within Eclipse, please see [[Importing the EMAC OE SDK Projects with Eclipse]]. Then, follow [[Using the EMAC OE SDK Projects with Eclipse]] for information on how to build, upload and execute the example. | ||
| − | + | Alternatively, the <code>Makefile</code> can be used with the <code>make</code> command from the commandline to build and upload the example. For more information on this method, please see [[Using EMAC OE SDK Example Projects]]. | |
| − | == | + | ==Usage and Behavior== |
| − | == | + | ===Hardware Requirements=== |
| − | The atod | + | The <code>atod_test</code> project requires a device with indexed atod functionality, ie: A SoM-9260, a SoM-9G20 or an IPAC-9302.<br /> |
| + | You can also use a SoM-150ES carrier (using the mcp3208 external AtoD device through /dev/mcp3208-gpio). This interface uses the EMAC ioex class to provide a GPIO-like device where each channel can be read directly (see also the [http://wikidev.emacinc.com/wiki/Example_egpc egpc example project]). | ||
| + | |||
| + | <gallery mode="packed"> | ||
| + | File:Som 9260.jpg|SoM-9260 | ||
| + | File:Som 9G20.jpg|SoM-9G20 | ||
| + | File:IPAC-9302.jpg|IPAC-9302 | ||
| + | File:SoM-150ES.jpg|SoM-150ES | ||
| + | </gallery> | ||
| + | |||
| + | ===Using <code>atod_test</code>=== | ||
| + | |||
| + | indexed_atod_test DEVICE CHANNELS | ||
| + | |||
| + | Where DEVICE is the path to the device to read and CHANNELS is the number of channels to read. | ||
| + | |||
| + | ===Usage Example=== | ||
| + | |||
| + | <syntaxhighlight lang="text"> | ||
| + | root@som9g20:/tmp# ./indexed_atod_test /dev/indexed_atod 4 | ||
| + | [0] = 19 | ||
| + | [1] = 76 | ||
| + | [2] = 18 | ||
| + | [3] = 22 | ||
| + | </syntaxhighlight> | ||
| + | |||
| + | ==Summary== | ||
| + | |||
| + | The <code>atod_test</code> C example project demonstrates reading the channels of an indexed atod device. | ||
Latest revision as of 11:04, 10 April 2014
This is a guide to the atod_test C example project included in the EMAC OE SDK.
This application reads all channels of an indexed atod device and reports the values read from those channels to the console. Examples of this type of device are the processor AtoDs on the SoM-9260/9G20 and the IPAC-9302; and the mcp3208 external AtoD devices on the SoM-150ES carrier (see hardware requirements, below).
The atod_test project builds one executable: indexed_atod_test.
Contents
Opening, Building and Uploading the Project Files
For information on opening the project from within Eclipse, please see Importing the EMAC OE SDK Projects with Eclipse. Then, follow Using the EMAC OE SDK Projects with Eclipse for information on how to build, upload and execute the example.
Alternatively, the Makefile can be used with the make command from the commandline to build and upload the example. For more information on this method, please see Using EMAC OE SDK Example Projects.
Usage and Behavior
Hardware Requirements
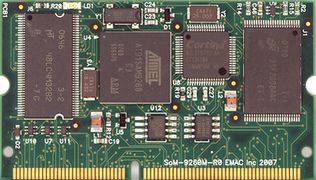
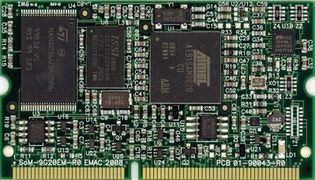
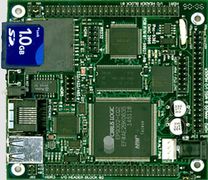
The atod_test project requires a device with indexed atod functionality, ie: A SoM-9260, a SoM-9G20 or an IPAC-9302.
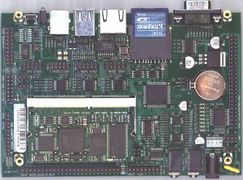
You can also use a SoM-150ES carrier (using the mcp3208 external AtoD device through /dev/mcp3208-gpio). This interface uses the EMAC ioex class to provide a GPIO-like device where each channel can be read directly (see also the egpc example project).
Using atod_test
indexed_atod_test DEVICE CHANNELS
Where DEVICE is the path to the device to read and CHANNELS is the number of channels to read.
Usage Example
root@som9g20:/tmp# ./indexed_atod_test /dev/indexed_atod 4
[0] = 19
[1] = 76
[2] = 18
[3] = 22
Summary
The atod_test C example project demonstrates reading the channels of an indexed atod device.


