Difference between revisions of "Installing TFTP server"
(→Installing tftpd on Ubuntu) |
(→Installing tftpd on Ubuntu) |
||
| Line 27: | Line 27: | ||
} | } | ||
| − | Run the following to create the TFTP server's base directory: | + | Run the following to create the TFTP server's base directory and allow anyone to access it: |
sudo mkdir /tftpboot | sudo mkdir /tftpboot | ||
sudo chmod -R 777 tftpboot | sudo chmod -R 777 tftpboot | ||
Revision as of 13:44, 27 December 2013
Contents
Background Information
The Trivial File Transfer Protocal, or TFTP, is used to transfer files from machine to machine with less overhead than other protocols. For more information about TFTP, see the following page: http://en.wikipedia.org/wiki/Trivial_File_Transfer_Protocol
Nearly all of the EMAC ARM based systems require a TFTP server to transfer the Linux kernel and file system to the board from a host PC. The boot loader will connect to the server to retrieve specific files and relocate them to SDRAM, which enables them to be programmed onto the target's flash.
Installing a TFTP server on Ubuntu
There are several TFTP server alternatives in Ubuntu. The tftpd or tftpd-hpa packages are recommended for installation.
Installing tftpd on Ubuntu
|
|
This following procedure works on Debain and should work on other Debain based Linux distributions. |
To install the tftpd package, run the following:
sudo apt-get install tftpd
To configure the the TFTP server, create /etc/xinetd.d/tftp with the following contents:
service tftp
{
protocol        = udp
port            = 69
socket_type     = dgram
wait            = yes
user            = nobody
server          = /usr/sbin/in.tftpd
server_args     = /tftpboot
disable         = no
}
Run the following to create the TFTP server's base directory and allow anyone to access it:
sudo mkdir /tftpboot
sudo chmod -R 777 tftpboot
sudo chown -R nobody /tftpboot
Once the configuration is complete the xinetd start should be restarted to enable the server:
sudo /etc/init.d/xinetd restart
The TFTP server is then ready to send/recieve files from /tftpboot.
|
|
The directory used for the TFTP server can be changed using the server_args variable in the /etc/xinet.d/tftp file. |
Installing a TFTP server on Windows
For Window's based systems, EMAC recommends the Tftpd32 server.
Download the latest version of the program from the download page at: http://tftpd32.jounin.net/tftpd32_download.html
When the installer is finished downloading, run the .exe to start the installation. Note that Windows may ask for approval to run the installer.
When the license agreement window appears click I Agree.
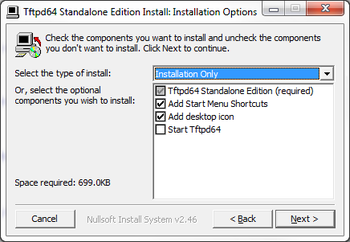
Next the options windows will appear. Leave the default options and click Next.
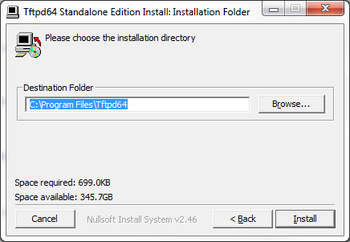
When the installation directory windows appears click Install.
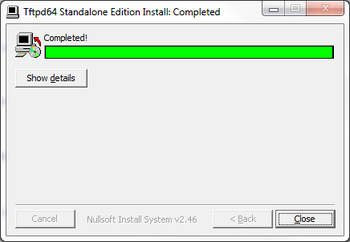
Upon sucessful installation, click Close.
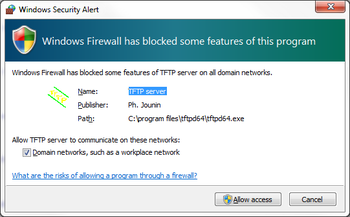
The TFTP server is now installed on your Windows box. Select the program from the start menu or Desktop to launch the server. The following firewall message may appear, click Allow access to continue.
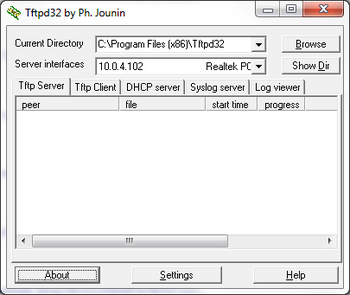
The main window for the TFTP server should appear.
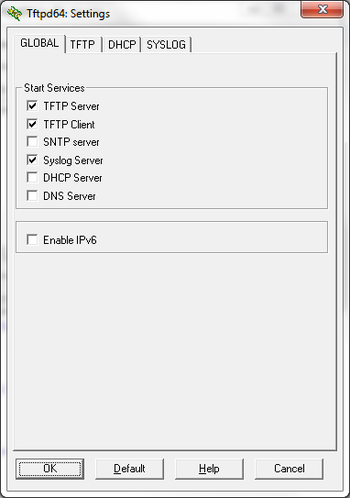
Click the Settings button to configure the server. In the GLOBAL tab unselect the DHCP Server check box.
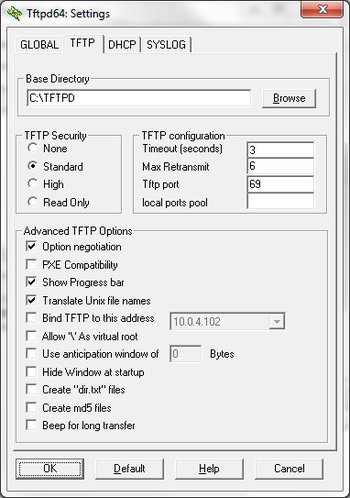
Next click the TFTP tab to configure the TFTP server. The Base Directory should be changed to the directory which will contain the files to transferred. Clicking Browse under Base Directory will bring up a window to select the appropriate directory. Once the directory is set click Okay to return to the main window.
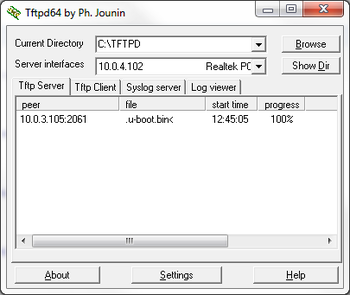
Place the files that are to be transferred into the selected base directory. Upon successful transfer from the TFTP, the Tftp server tab will temporarily display the transfer.

