Importing the EMAC OE SDK Projects with Eclipse
In order to use the Eclipse IDE for EMAC product application development, the EMAC OE SDK must first be imported into the Eclipse workspace. This guide will explain the steps required to do so. This guide will assume that the SDK has already been installed and configured .
Contents
Procedure
The EMAC SDK is an Eclipse project and can be imported directly into the Eclipse workspace.
- Start Eclipse.
- Select a workspace directory such as /home/developer/workspace.
- Open the C/C++ perspective if not already open by selecting Window->Open perspective-> Other...
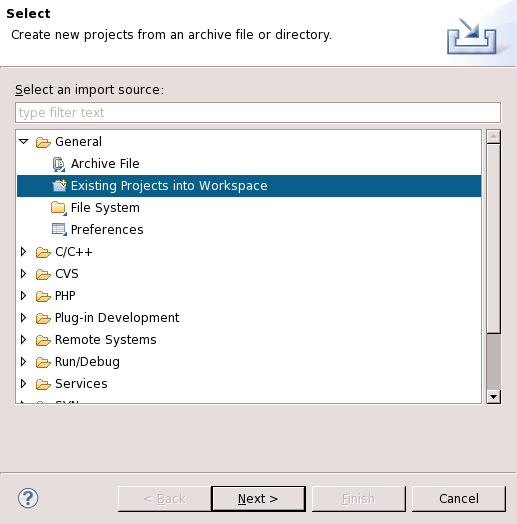
- Select File->Import to bring up the import source window as in Figure 1.
- Expand the General list and select Existing Projects into Workspace
- Click Next then Browse
- Browse for the appropriate SDK base directory. Ensure that the project is selected under the Projects section.
File:Emac eclipse import-2 nodeco.png
Figure 2: Select Import Directory
- Click Finish The SDK will appear in the Project Explorer view as shown in Figure 3.
File:Emac eclipse import-5 nodeco.png
Figure 3: C/C++ Perspective with EMAC OE SDK
Next Steps
Now that the EMAC OE SDK is imported into Eclipse, the next step is to use the example projects .
