Wifi
This guide will illustrate how to set up and connect to a wireless network using the ThinkPenguin Wireless N USB Adapter for GNU/Linux and the built-in WiFi on the SoM-200GS.
Contents
Background
Most of the machines from EMAC are able to use wireless networking via a USB adapter. The USB adapter can be purchased at the ThinkPenguin website or directly from EMAC. EMAC's SoM-200GS carrier can optionally be ordered with built-in WiFi and bluetooth.
| WARNING! |
| A bit more background info would be nice. Why USB dongles? Why ThinkPenguin? etc |
General Information
Setup
| WARNING! |
| These descriptions need to be fleshed out the same way you fleshed out sentences in the Getting Started document I just reviewed. |
- This process requires modifying some system files so start by allowing the system to read and write.
root@ipac9x25:~#mount -o remount,rw /
- Check for any updates.
root@ipac9x25:~#opkg update
- Install wpa-supplicant to allow connections to WPA and WPA2 protected networks.
root@ipac9x25:~#opkg install wpa-supplicant
- Install the firmware for the USB adapter.
root@ipac9x25:~#opkg install linux-firmware-ath9k
- Install the marvel firmware and the sd8787 firmware for built-in WiFi on the SoM-200GS.
root@som9g45:~#opkg install linux-firmware-marvel-licenseroot@som9g45:~#opkg install linux-firmware-sd8787
- Install the iw and wireless-tools packages.
root@ipac9x25:~#opgk install iw
root@ipac9x25:~#opkg install wireless-tools
| WARNING! |
| The above should be in just one continuous cli output box, so that it looks like it does in real life. Hit edit to look at the wiki markup to see how I did this on this page: Installing_LILO.
<cl> tag in the above referenced page. This is for the Continuous Lists extension. You need to make use of this for your lists. There should be documentation on it if you use google. |
- Once everything has successfully installed, reboot the system. If you're using the USB adapter, plug in the adapter upon successful login.
| WARNING! |
| Why do they have to plug this in upon log in? Why can't they keep it plugged in? It's not going to be usable for our customers if they have to manually plug it in after logging in. |
- More configuration to system files is required to establish a connection to the network. Mount the file system to read and write.
root@ipac9x25:~#mount -o remount,rw /
| WARNING! |
| This step ^^ logically belongs in the next section, since sections should stand alone. |
Wireless Networking
After setup of the required software is complete, the connection may be established.
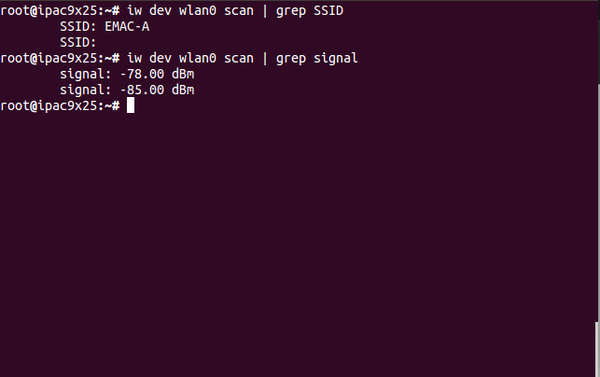
1. Use iw to scan for nearby wireless networks.
root@ipac9x25:~#iw dev wlan0 scan- This will produce a list of nearby networks and detailed information about each network including SSID, the type of security, frequency, and signal strength. Use
grepto help make identifying the SSID and signal strength easier. For the signal strength, the closer the value is to 0, the stronger the signal is.
2. For an open network, uncomment the lines in /etc/wpa_supplicant.conf and edit the SSID:
###open network
#network={
#      ssid="your-ssid" (optional)
#      scan_ssid=1
#       key_mgmt=NONE
#}
| WARNING! |
Instead of using the <pre> tag, you should use the <syntaxhighlight> tag. We use this tag consistently to ensure all such text looks alike. It will provide syntax highlighting for a variety of scripting languages, and may work to provide syntax highlighting for this config file using the shell/bash language.
|
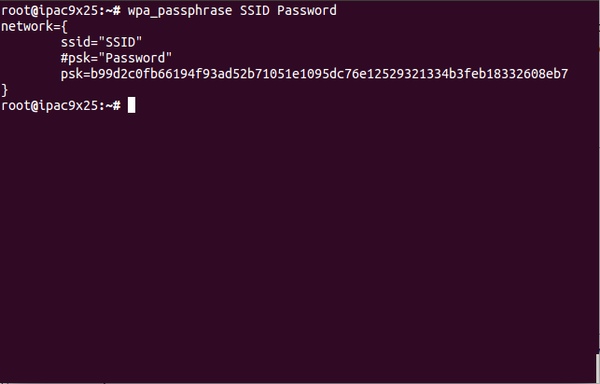
3. For a WEP password protected network, use wpa_passphrase to generate the private shared key(psk).
| WARNING! |
These should not be screenshots. You should copy and paste the text, and use the cli template set to display multi-line output, as can be seen in the LILO page I linked in this page earlier. Also, look at what I've enclosed in code tags. You need to check through the document for any command or filename, and enclose it within <code></code> tags. |
- SSID is the SSID of the preferred network found when scanning with iw. Password is the password to connect to the network.
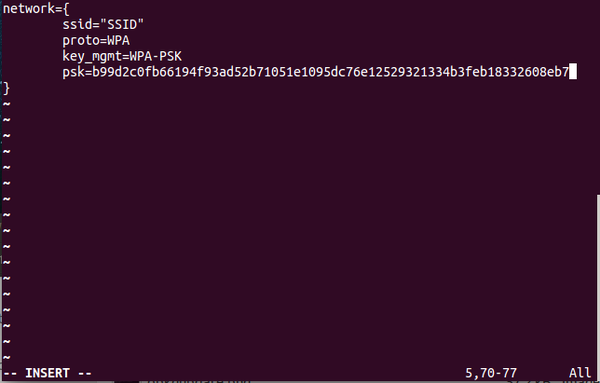
4. Highlight the psk and copy it.
5. Edit /etc/wpa_supplicant.conf to have the appropriate SSID and psk
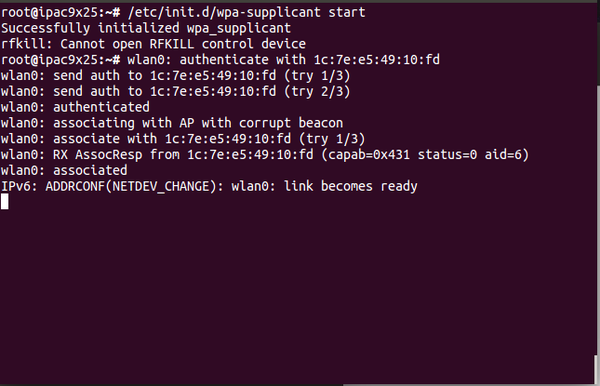
6. Make the connection to the network using the path /etc/init.d/wpa_supplicant with the argument start.
root@ipac9x25:~#/etc/init.d/wpa_supplicant start- Give the command some time to establish the connection and watch the terminal output. A connection has been established when output stops and the last line reads:
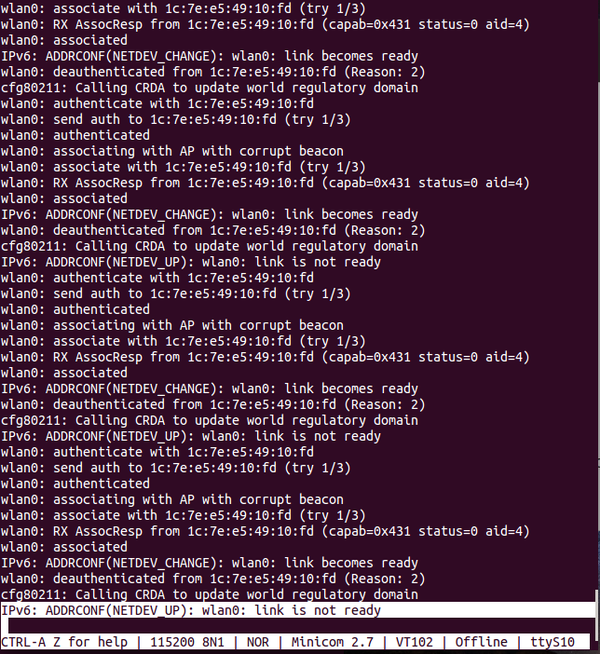
A connection has failed if the following is seen repeatedly and output to the terminal continues:
- Successful connection (waiting a full minute to ensure output to the terminal stopped);
- Failed connection (waiting more than a minute as output continues to print to the terminal). The highlighted line and the repeated lines indicate an issue establishing the connection.
| WARNING! |
Again, none of these should be screenshots. Change them all to multiline output using the {{clo}} {{clos}} {{clio}} {{cli}} {{icli}} etc. templates, as described in EMACTemplatesInternalPg. Note that you can click on any of the template links in that page to get more info and some examples. |
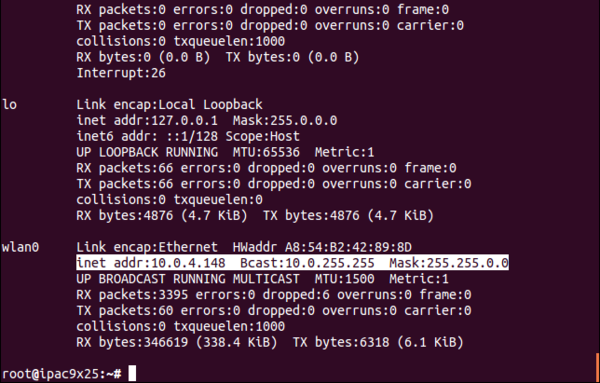
7. Confirm there is an IP address under wlan0 with the ifconfig command
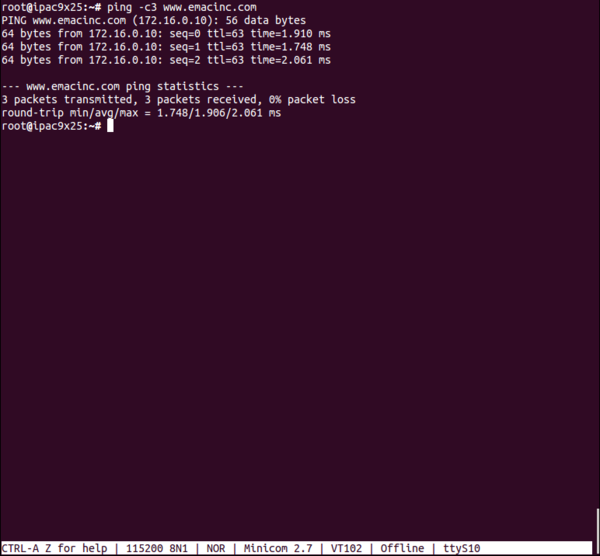
8. Disconnect any Ethernet connections and ping to www.emacinc.com to verify that the system can wirelessly connect to the Internet.
Conclusion
This page walks through the procedure to connect a module to a wireless network via a WiFi adapter or built-in wireless, as well as acquiring the necessary software tools to make the connection for the first time.
| WARNING! |
| Strengthen the conclusion. Don't be afraid to make the conclusion long. Describe things the reader should do next.
|
