Cutipy Getting Started
This page outlines a basic guide to getting starting using the Cutipy.
Contents
General Information
Tools Required
- Desktop PC (Windows/Linux/Mac will work)
- Mini-USB to USB Cable
Setup
1. Connect the Cutipy to your PC using the Micro-USB to USB cable.
2. Open your preferred serial monitoring program:
- On Windows use [[ https://www.putty.org/ | PuTTY ]]
- On Linux or Mac use Minicom
3. Create a terminal Session with the board:
- On Windows:
- Open device manager, right click on the new device, and click 'Update driver software'.
- Browse for 'pybcdc.inf' which should be on the Cutipy (It will show up similar to a USB thumb drive, the directory will be called PYBFLASH), select this file.
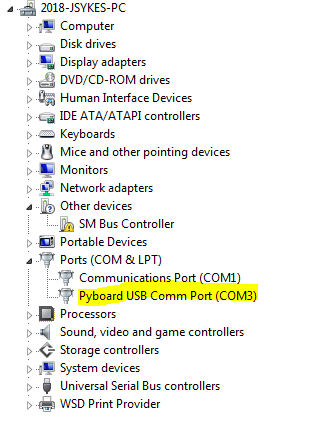
- The device should now show up under 'ports'.
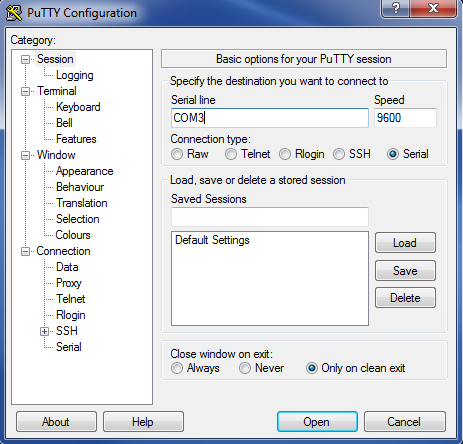
- Open PuTTY and select a ‘Serial’ connection type and enter the Comm Port shown on your ‘Device Manager’.
- On Linux/Mac:
- Figure out which tty your device is connected to (Most likely /dev/ttyACM0). You can do this by running 'dmesg -w' and then plugging in the board.
- Follow these instructions to set up minicom. When setting the 'Serial Device', enter the port you found in the step above.
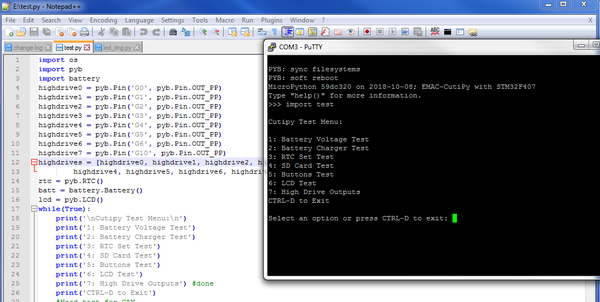
4. You should now have a REPL session open with the Cutipy. This is identical to a typical Python3 CLI interface.
Developing with the Cutipy
1. Using your choice of text editor / IDE, you can write [[ https://micropython.org/ | Micropython ]] scripts.
2. From there, they can be loaded onto the Cutipy by simply moving the python file to the PYBFLASH directory.
3. Run these files by simple typing "import filename" in the REPL session.


