Executing Remote Applications with Eclipse
| Table 1: Conventions | |
|---|---|
| connection_name | Refers to the name of the connection used to connect to the target board. |
| app_name | Refers to the target name of the application being developed. |
target_board |
Refers to the name of the device for which the application is being developed. |
Remote development using Eclipse is enhanced with tools such as the Eclipse Run/Debug Configurations and SSH which enable the remote execution of the application on the remote board. The Eclipse Run/Debug Configurations provide a way to transparently run an application on the remote board by automatically uploading the binary, changing execute permissions, executing, and interacting with the application using an SSH Shell.
Setup
Before continuing, ensure that Eclipse is open to the C/C++ or Qt C++ perspective.
- Open EMAC Eclipse
- Click Window -> Open Perspective -> Other...
- Select C/C++ or Qt C++ (if developing a Qt application)
- Click OK
Create a Run Configuration
Launching an application from within Eclipse requires that a Run Configuration be created. This configuration provides Eclipse all the information it needs to be able to run a specific application. The application can be located either on the development machine or on the target machine provided a suitable connection is available. The following procedure assumes that the application being run is located on a remote target machine. This will be the case for all application development for EMAC products.
- Create a new launch configuration
- In the Project Explorer View, right-click the project to be run
- Select Run As -> Run Configurations... to bring up the Run Configuration Dialog.
- In the Type List, right-click C/C++ Remote Application and select New... from the context menu. A new configuration will appear with the Name: equal to the name of the currently open project. This name can be changed by editing the Name: field.
- For instructions relating to fields in the main tab, refer to Figure 1 below.
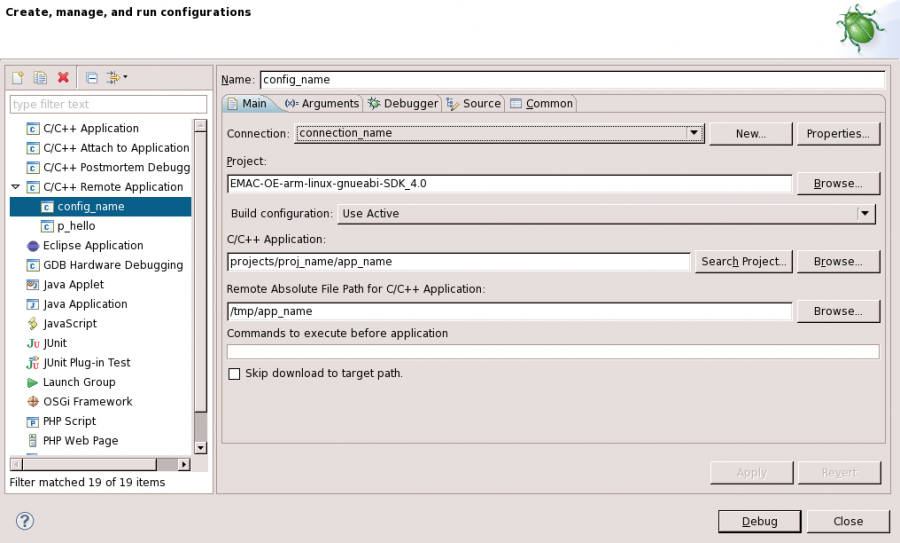 Figure 1: Run / Debug Configuration Main Tab
- Choose a connection from the Connection: drop-down menu or click New... to create a new one.
- The default for the Project: field will be the currently-active project. If this is not set to the project that you wish to run, click Browse... to choose the correct one.
- Choose a C/C++ Application: value by manually typing the app_name with path hierarchy into the field, using the Search Project... dialog to search the current project, or manually browsing for the application using the Browse... button.
- Choose a Remote Absolute File Path for C/C++ Application: value. Note that this location must be writable on the target board. EMAC recommends using the
/tmpdirectory for initial application testing, as this location is linked to a ramdisk and avoids unnecessary writes to the flash. Type the desired location in the provided text field, or select Browse... to search the remote filesystem for the target binary. Note that this step requires that the Connection: field is set to a valid connection and the development machine is connected to the target board.
