Getting Started With Qt Creator
The following page describes the process of getting familiar with EMAC Qt Creator.
Contents
Background
Qt Creator is a cross-platform Open Source Integrated Development Environment (IDE) that can be used to develop software for many different languages. It includes a visual debugger and an integrated GUI layout and forms designer. See the Qt Project site for more information http://qt-project.org/wiki/Category:Tools::QtCreator.
General Information
Tools Required
- EMAC OE SDK 5.0
- EMAC Qt Creator
- GNU make
- cmake
Setup
- Make sure the system is configured for the correct target machine and that the IP and user/password are set.
- Launch EMAC Qt Creator.
Getting Started with Qt Creator
| NOTE |
| Until there is a working desktop icon to use, the user should still do steps 1 and 2 to run Qt Creator. |
1. Change directory to /opt/emac/5.0/EMAC-Qt-Creator/bin, enter the following command into terminal.
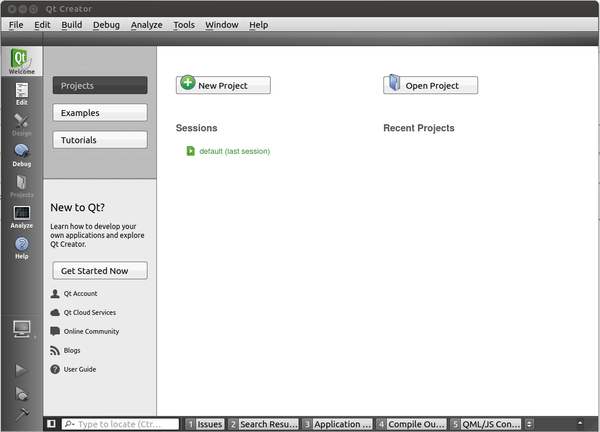
developer@ldc:~# cd /opt/emac/5.0/EMAC-Qt-Creator/bin 2. To initiate the Qt Creator GUI as shown in Figure 1 below, run the application with the following command.
developer@ldc:home/user/opt/emac/5.0/EMAC-QtCreator/bin# ./qtcreator
3. To generate a new project from Qt Creator, select "New Project" on the opening splash window. The examples being used are all written in C programming language.
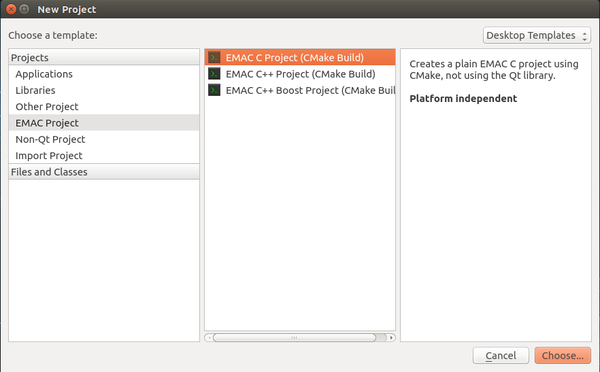
4. After selecting "New Project" a new window will pop up. To run a C programming example using EMAC hardware, select "EMAC Project" under the Projects tab. Then select "EMAC C Project (CMake Build)". Click the "Choose" button on the bottom right of window to continue to the next page as shown in Figure 2.
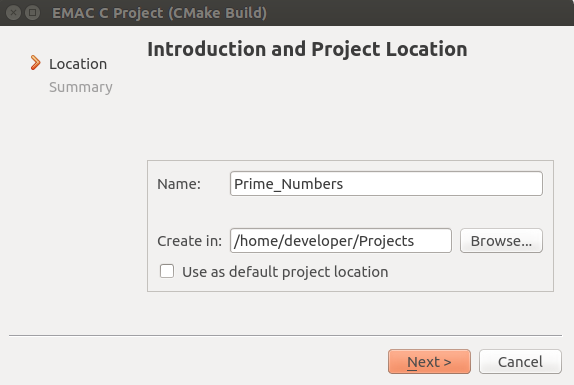
5. The next page will be "Introduction and Project Location". Select a name for the C project. Once the project name is given, choose a a directory to store the project. Note: It is highly recommended to store your project other than the default location. For this example, we used /home/developer/Projects.
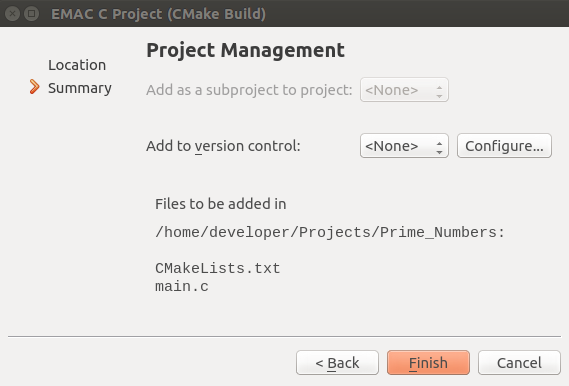
6. The next page summarizes the EMAC C Project. Click "Finish" to continue.
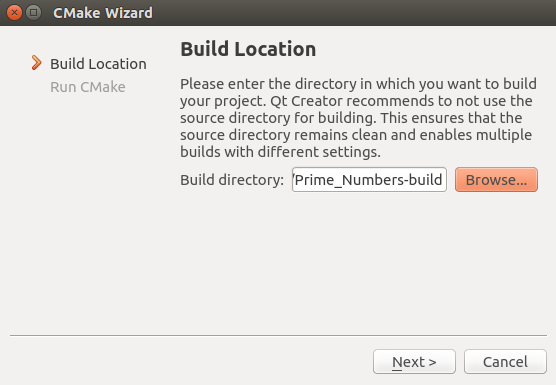
7. Next, it will prompt you to the "CMake Wizard Build Location". Click "Next" to continue. Note: It is highly recommended to use the default build directory as stated below in Figure 5.
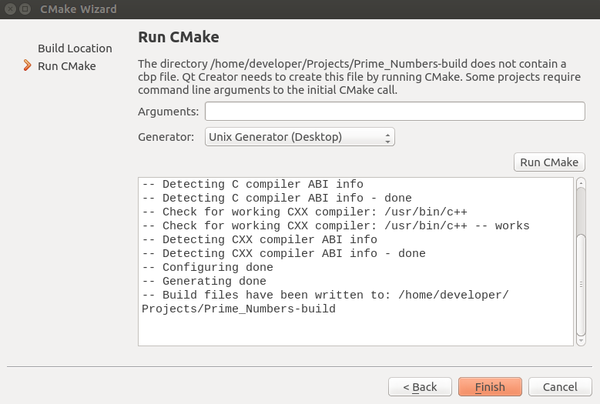
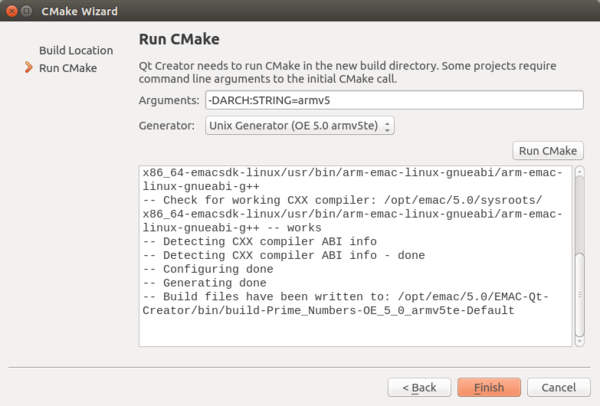
8. "CMake Wizard" will then prompt you to "Run CMake". For setting up the Desktop Kit, click "Run CMake" and the output should be similar to Figure 6 below. Click "Finish" to start new project.
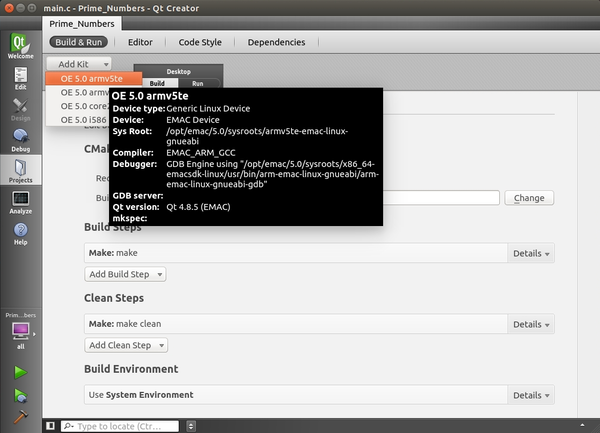
9. Once the Desktop Kit is configured, the hardware architecture kit needs to be installed. Navigate to "Add Kit" in the "Projects" tab. Under "Add Kit" select the architecture for the board being used. Click "EMAC OE 5.0 armv5te".
| NOTE |
| The board being used will be the iPac-9x25. The iPac-9x25 is a 32-bit architecture armv5te. |
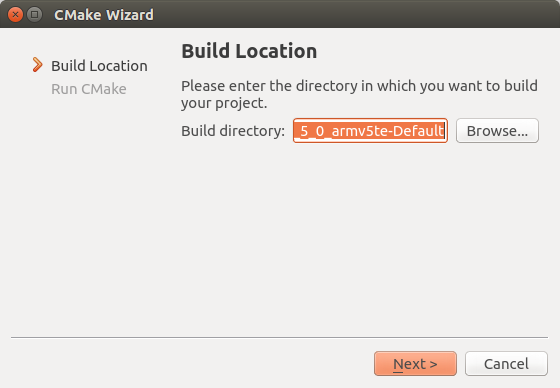
10. As previously stated in step 7 it will prompt you to the "CMake Wizard Build Location". Click "Next" to continue. Note: It is highly recommended to use the default build directory as stated below in Figure 8.
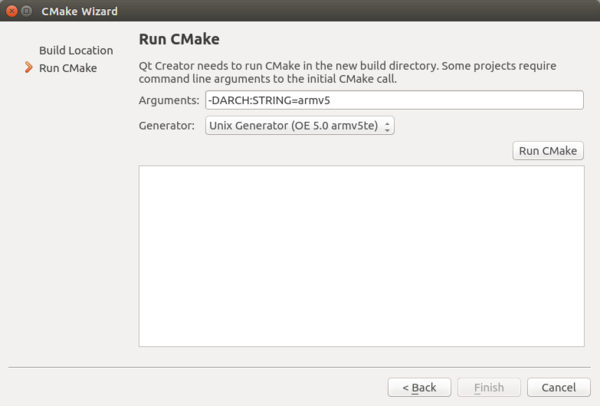
11. "CMake Wizard" will then prompt you to "Run CMake". For setting up the iPac-9x25 armv5 kit, click the box next to "Arguments". Copy and paste the string below:
-DARCH:STRING=armv5
EMAC SDK provides three other architectural kits. If using one of these other architectures below, Copy and paste the argument string in the "Arguments" box.
-DARCH:STRING=armv7
-DARCH:STRING=core2
-DARCH:STRING=i586
12. Once the arguments string is pasted in the box, click "Run CMake" and the output should be similar to Figure 10 below. Click "Finish" to add the armv5 kit to the current project.
13. To confirm if the kits installed correctly, click on the "All" tab on the left hand side of the Qt Creator window as shown in Figure 11. Both "Desktop" and "EMAC OE 5.0 armv5te" kit will be present.
Examples
This section will show how to run C programming examples through the Qt Creator IDE. The example board will be the iPac-9x25.
The first example is a basic hello c example project.
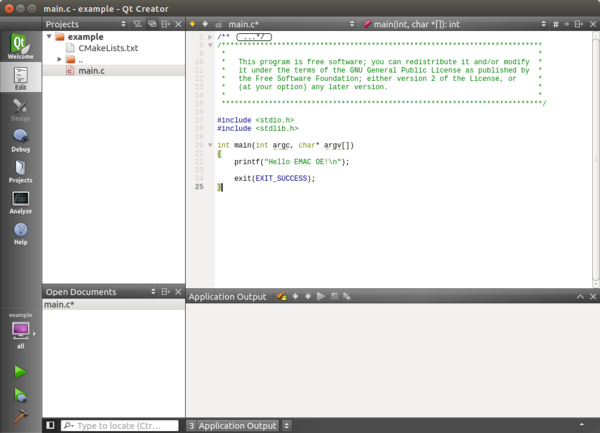
1. After creating a new project and installing the necessary kits for the target board, navigate to the "Edit" tab on Qt Creator. Qt Creator will automatically have the hello c example uploaded as shown in Figure 12.
#include <stdio.h>
#include <stdlib.h>

int main(int argc, char * argv[])
{
    printf("Hello EMAC OE!\n");

    exit(EXIT_SUCCESS);
}
2. Before executing the example, you must build the program first. Click on the build icon (hammer symbol) on the bottom left of the Qt Creator. If the build was successful, a green bar will fill on the bottom right of the Qt Creator.
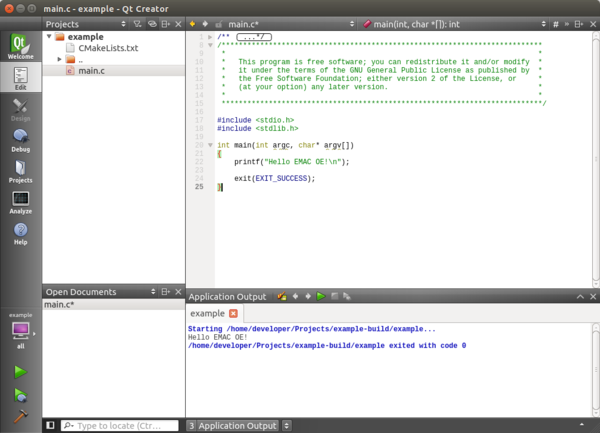
3. Once the program successfully builds, you can now run the program. Click on the run icon (green arrow symbol) on the left hand side of Qt Creator. The program prints Hello EMAC OE! in the "Application Output" terminal.
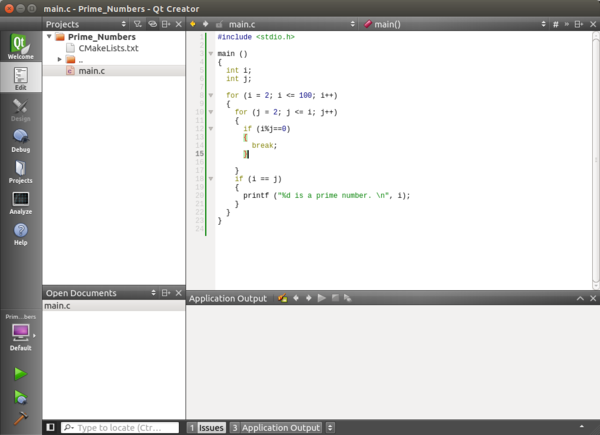
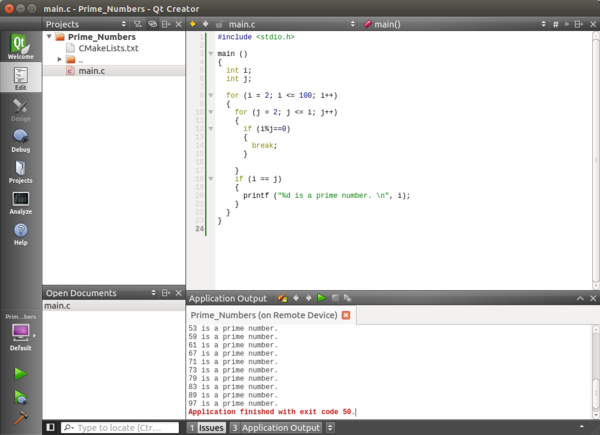
The second example will show how to run a c programming project on a target board. This example will show all prime numbers from 1 - 100 and output it on Qt Creator remote terminal.
1. Create a new project and install the necessary kits for the target board just as shown before. Call this project Prime_Numbers . Then Navigate to the "Edit" tab on Qt Creator. Copy and paste the following code below to the Qt Creator terminal.
#include <stdio.h>
#include <stdlib.h>

int main(int argc, char * argv[])
{
  int i;
  int j;

  for (i = 2; i <= 100; i++)
  {
    for (j = 2; j <= i; j++)
    {
      if (i%j==0)
      {
        break;
      }
    }
    if (i == j)
    {
      printf ("%d is a prime number. \n", i);
    }
  }
  return 0;
}
2. Click on the build icon (hammer symbol) on the bottom left of the Qt Creator. If the build was successful, a green bar will fill on the bottom right of the Qt Creator.
3. Click on the run icon (green arrow symbol) on the left hand side of Qt Creator. The program prints all prime numbers from 1 - 100 in the "Application Output" terminal.
Conclusion
This page is a quick getting started tutorial on how to use EMAC Qt Creator for the first time. It shows you how to create an EMAC C Project, set up the necessary kits for your target board, and how to build and run example projects.
Further Information
Where to Go Next
- TBD
Pages with Related Content
- TBD
