Getting Started With Qt Creator UPDATE 2019
The following page demonstrates the process of getting familiar with EMAC Qt Creator and running it on the target machine.
Contents
Video Series
Background
Qt Creator is a cross-platform Open Source Integrated Development Environment (IDE) that can be used to develop software for many different languages. It includes a visual debugger and an integrated GUI layout and forms designer.
For more information visit the Qt Project site http://qt-project.org/wiki/Category:Tools::QtCreator.
General Information
Tools Required
These tools should already be installed if you installed the EMAC SDK using the automatic installer.
- EMAC OE 5.X SDK
- EMAC Qt Creator
- GNU
make - CMake
Setup
- Make sure the system has the EMAC OE 5.X SDK and tools installed.
- Launch EMAC Qt Creator.
Getting Started with Qt Creator
1. Launch Qt Creator using one of the following methods:
- Click the Qt Creator icon on the the desktop
- In the terminal, execute the following commands:
developer@ldc:~# cd ~/EMAC-SDK/emac-QtCreator/bin developer@ldc:~/EMAC-SDK/emac-QtCreator/bin# ./qtcreator.sh
2. To generate a new project from Qt Creator, select New Project on the opening splash window. The examples being used are all written in the C programming language.
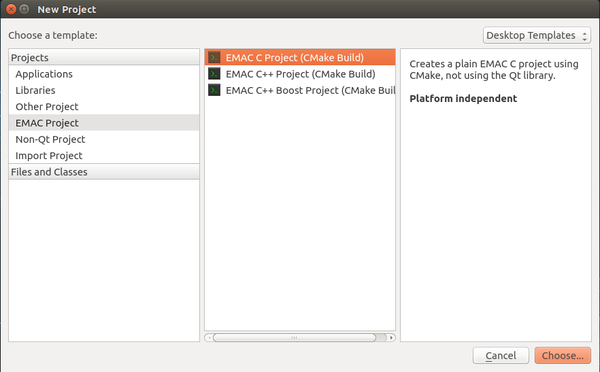
3. After selecting New Project a new window will pop up. To run a C programming example using EMAC hardware, select EMAC Project under the Projects tab. Then select EMAC C Project (CMake Build). Click the Choose button on the bottom right of the window to continue to the next page as shown in Figure 3.
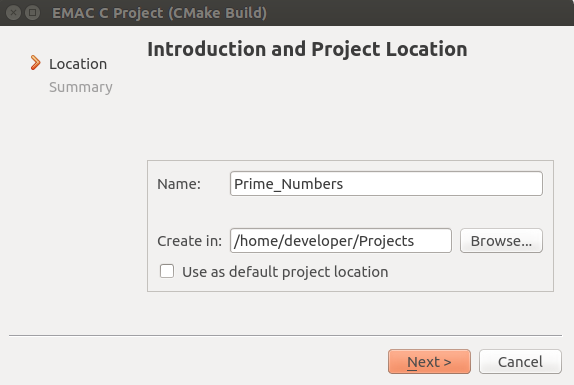
4. The next page will be Introduction and Project Location. Select a name for the C project. Once the project name is given, choose a directory to store the project. Note: It is highly recommended to store your project somewhere other than the default location. For this example, we used /home/developer/Projects.
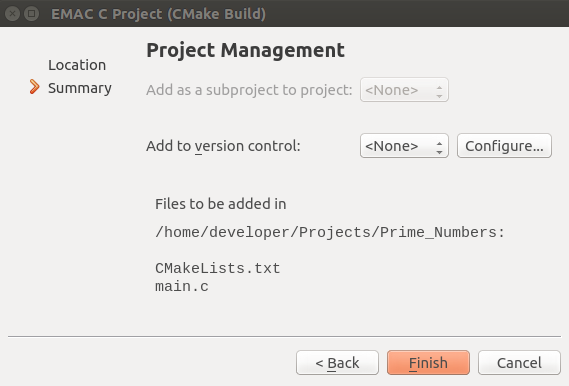
5. The next page summarizes the EMAC C Project. Click Finish to continue.
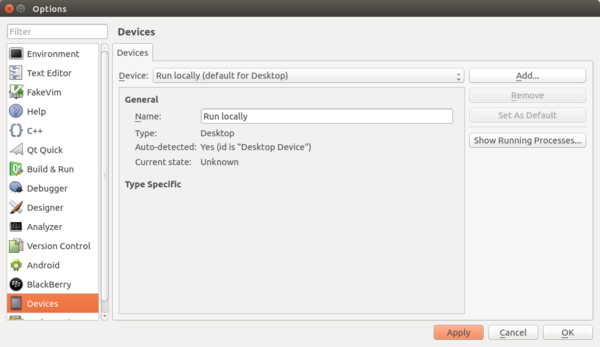
6. The next step is to set up the device you will be using for the Qt Creator examples. Click Tools -> Options
| NOTE |
| The board used for this example is the iPac-9x25. The iPac-9x25 is a 32-bit ARM architecture. Make sure to connect power, Ethernet, and serial to the board. |
7. Select Devices from the left pane.
8. Click the Add button
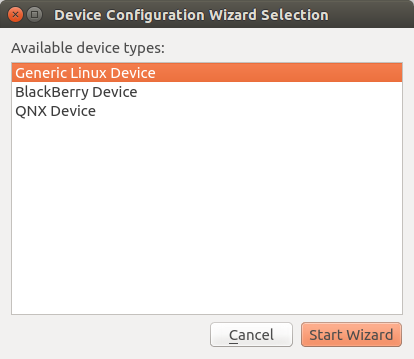
9. Select Generic Linux Device, then click Start Wizard.
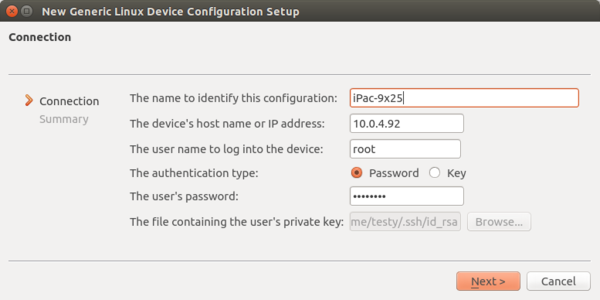
10. Type in a name, the IP address, the user name, and the password for the device. Use the credentials below to sign in.
| Table 4: Default Login Credentials | |
|---|---|
| Username | Password |
| root | emac_inc |
11. Click Next.
12. Click Finish.
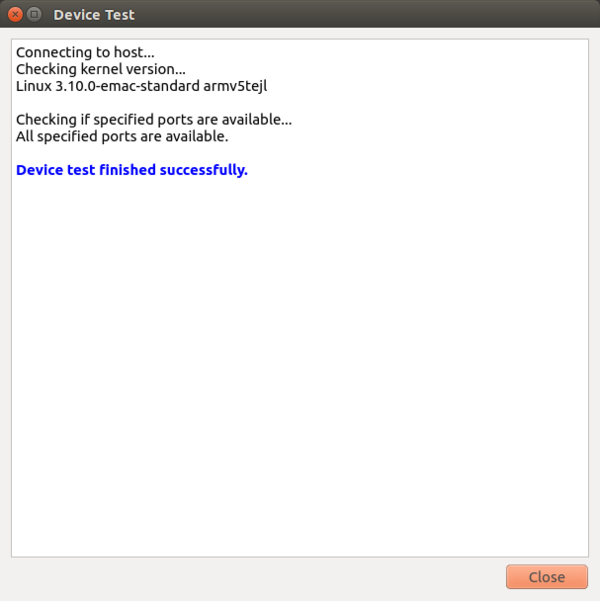
13. A connection will be established with the target device.
14. Click Close.
15. Click Apply.
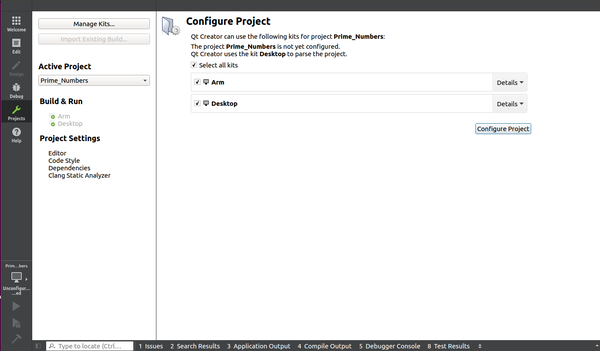
16. Navigate to the Projects tab. Here, Qt Creator will ask you to select which kits you will be using with the project. For this example, we made sure the arm kit was selected. Then click Configure Project.
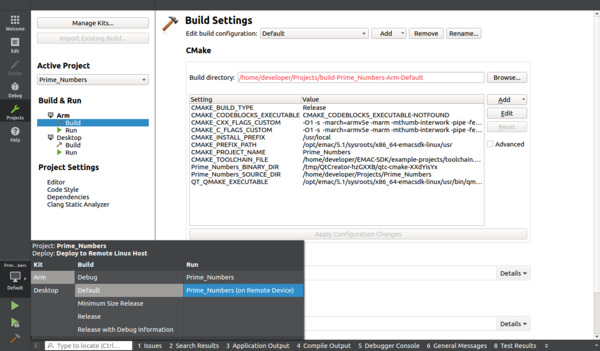
17. Now, on the left side of Qt Creator, you will see the project icon, which looks like a monitor. Click this and make sure Arm is selected under Kit, Default is selected under Build, and the project is set to be run on the remote device under Run.
18. Now, simply press the green play button. The program should run on the target device and yield an output.
Adding Source Files
To add source files .c/.h
- Right click on CMakeLists.txt and select Show Containing Folder to open the project directory.
- Create and name files within this directory. For example we'll create Example.c and Example.h
- Back in Qt Creator right click on the project folder and select Run CMake to add the files to the project.
The files are now visible and directly editable from within the Qt Creator IDE.
Changing the Remote Directory
The remote directory where the executable is uploaded on the target device can be changed as follows:
- Right click on CMakeLists.txt and select Show Containing Folder to open the project directory.
- Within the project directory is a file called QtCreatorDeployment.txt, open it.
QtCreatorDeployment.txt just holds the directory path where the executable will be uploaded. Simply replace the current path (in this case /tmp) with a path of your choosing.
| NOTE |
| Changing the target directory to a directory outside of tmp will require remounting the file system to read-write mode. This can be done by entering the command, oemntrw on the target device terminal. This will only change the root filesystem to read-write for the current boot. When the system is rebooted, the root filesystem will once again be mounted read-only. |
Conclusion
This page is a quick getting started tutorial on how to use EMAC Qt Creator for the first time. It shows you how to create an EMAC C Project, how to set up the necessary kits for your target board, how to set up your target board, and how to build and run example projects.
