Remote System Explorer Shell and Terminal Setup
There are two methods for using SSH in Eclipse: the SSH Terminal and the SSH Shell. From the perspective of the target board, there is little difference between the two. However, from the perspective of the development machine, the Eclipse Shell has the additional capability of storing command and output history and specifying environmental variables locally to be passed to the remote machine with each connection. The SSH Terminal provided by the RSE plugin provides a complete terminal implementation suitable for interactive applications such as editing files. In contrast, the SSH Shell is better suited to entering simple commands and viewing the output.
| connection_name | Refers to the name of the connection used to connect to the target board. |
| app_name | Refers to the target name of the application being developed. |
| target_board | Refers to the name of the device for which the application is being developed. |
Contents
Creating an SSH Shell or Terminal Connection
The method for opening SSH Shells and SSH Terminals is very similar:
-
First, create a connection to a remote system according to the RSE Setup guide.
-
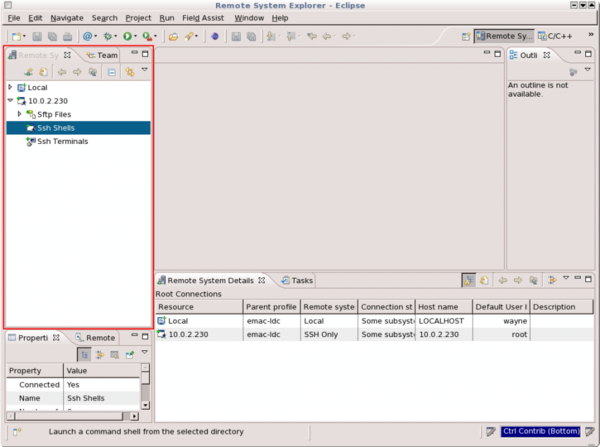
In the Remote Systems View, expand connection_name as shown in Figure 1 below.
-
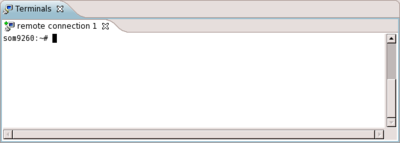
To open an SSH Terminal as in Figure 2, right-click Ssh Terminals and select Launch Terminal.
-
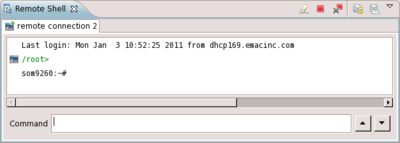
To open an SSH Shell as in Figure 3, right-click Ssh Shells and select Launch Shell.
The SSH Shell has the added benefits of advanced formatting, setting environment variables for the remote shell, and logging the shell output to a file on the development machine. See the following sections for additional SSH Shell usage options.
SSH Shell Additional Options
The RSE SSH Shell has the following additional features:
Save Command History and Shell Output
This feature enables the command history or the output of a particular shell session to be logged for future reference. The steps to save the command history and output are as follows:
- Open the RSE Perspective as described in the RSE Setup guide.
- Expand connection_name.
- Expand Ssh Shells. If a shell does not currently exist, follow the steps above to open a shell connection.
- Right-click on the Ssh Shell connected to the target board. This should be labeled connection_name, the same as the remote connection assuming no deviation from the RSE Setup.
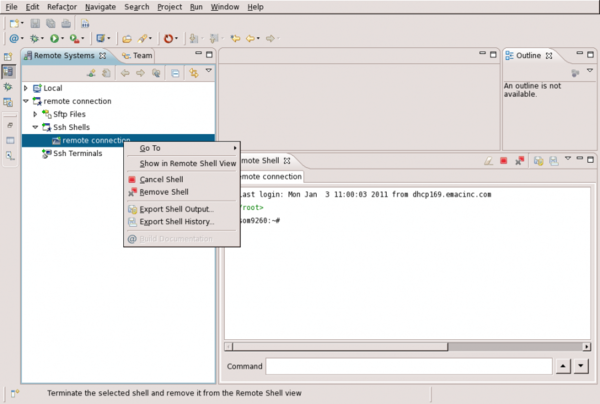
- To save the displayed output, click Export Shell Output... as shown in Figure 4.
- To save the command history, click Export Shell History... also shown in Figure 4.
Selecting either of the context menu items shown in Figure 4 will bring up a Save dialog to allow the user to enter a filename and choose a directory for the log file.
Set Environment Variables from within Eclipse
The RSE SSH Shell has the capability of storing environment variables across sessions. Follow the instructions below to access the SSH Shell properties dialog.
- Open the RSE Perspective.
- Expand connection_name in the Remote Systems View.
- Right-click on Ssh Shells and select Properties.
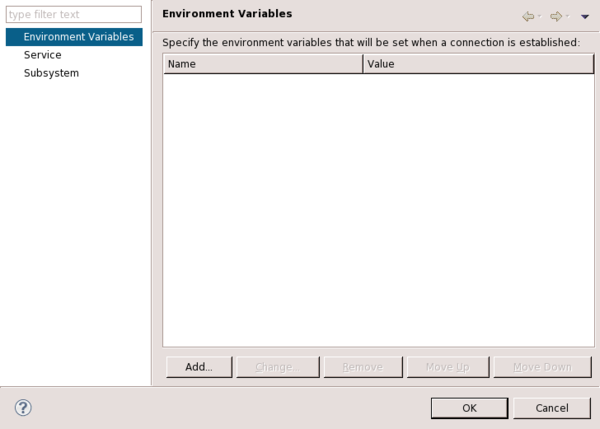
- Within the Ssh Shells Properties dialog, select Environment Variables from the type list. This should result in a screen similar to that in Figure 5 which provides the functionality of adding, changing, deleting, or moving environment variables which will be set when the SSH Shell is launched.
Next Steps
Learn more about executing remote applications by following the Executing Remote Applications with Eclipse guide.
